Plesk File Manager
Upload Files using Plesk File Manager
The easiest way to upload a large amount of files that need to stay organized in folders because of paths that have been used in your HTML code, is to upload them using the Plesk File Manager tool. So, for example, if you wanted to upload your INFO1311 project that contains many files that need to be saved in the same folder, you would log in to your Plesk account and then complete the following:
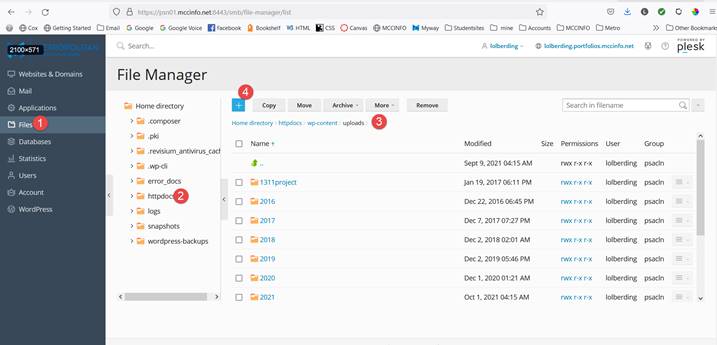
- Select Files in the menu on the left as show in the illustration below.
- Open the httpdocs folder where all of your WordPress files and folders are located
- Open the subfolder named wp-content and then open the subfolder names uploads. The path shown in #3 below should show httpdocs>wp-content>uploads
- Then click the + symbol and select Upload Directory to upload the directory that contains your info1311 final project. All of the HTML, CSS and image files should be in the project folder. Remember that file and folder names on a Web server cannot contain blank spaces.
**In the illustration below, the folder named 1311project was uploaded as a result of steps #1-4.
After the folder for your project is uploaded, you can find the URL for the HTML file that is the homepage of your project by doing the following:
- Open the info1311project folder
- Click on the menu icon on the far right of the HTML file that is the home page for the project
- Select Open in Browser from the menu
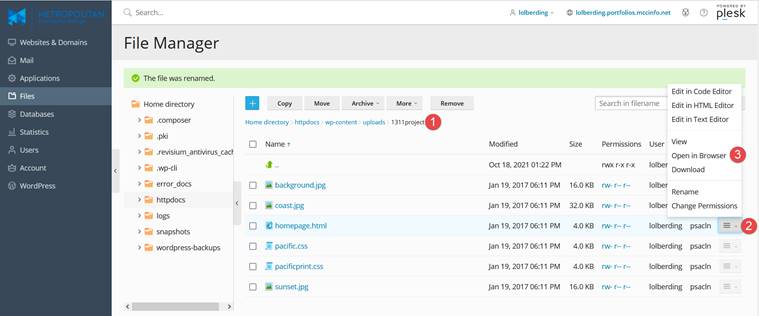
When you are viewing the project homepage in the browser, you can see the URL for this page in the address bar. This would be the URL that you would want to copy and use when creating a link to your INFO1311 project on your Artifacts page.
