Dreamweaver
Define a Dreamweaver Site
(Updated Winter, 2020)
Dreamweaver can be used to create individual pages but it also has many powerful features that enable you to manage and maintain an entire site. For you to take advantage of these site-management features, you will need to define a site in Dreamweaver. The term site refers to a collection of related web documents along with their supporting files and folders. A site can be stored on a local drive, an intranet, or on a Web server.
When defining a web site in Dreamweaver, you normally define two sets of site files:
- Local Folder--is where you would normally create and edit the working copies of the site files. This is usually a folder on your local hard drive. Once the site is ready to publish, you copy the files from the local folder to the remote site. Make sure you have created the Folder Structure as instructed in the previous handout before completing this exercise.
- Remote Site--is where the final published files go. This is the usually the directory on the Web server that is accessible via the Internet. Dreamweaver has a built-in FTP utility that is used to transfer the files from the local folder to the remote site.
Define a Site
The idea when defining a site in Dreamweaver is to have two copies of your web site with duplicate sets of files. You create web documents in the local folder and then duplicate those files on the remote site. To create this association between a local folder and a remote site, you must complete the process of defining a site.
The following list describes the information you will need to define a site:
- Name for the site
- Location of the local site files
- Location of the remote site
- User name and password for accessing the remote site
Defining a Site on a Metro Server
Once you have all of the information listed above you can define the site in Dreamweaver.
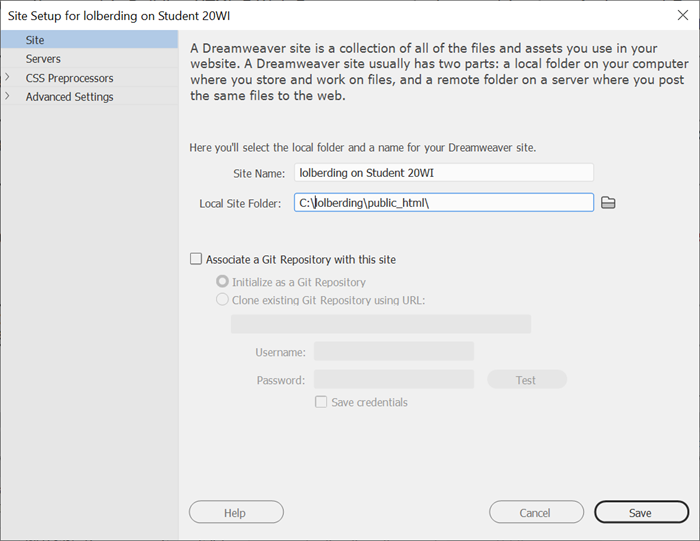
- Select Site | New Site... from the menu. The Site Setup dialog box will open.
- Type in a name for your site. The illustration below shows lolberding on Student as the site name (replace username with your username which is usually your first initial, middle initial, and then your entire last name).
- To define your Local Site Folder, you will need to enter the path to where we want the files to be stored on your local system. You can do this by using the Browse for Folder icon and then select the folder you created using your username and then the folder named public_html as the path for the Local Site Folder (C:\username\public_html)
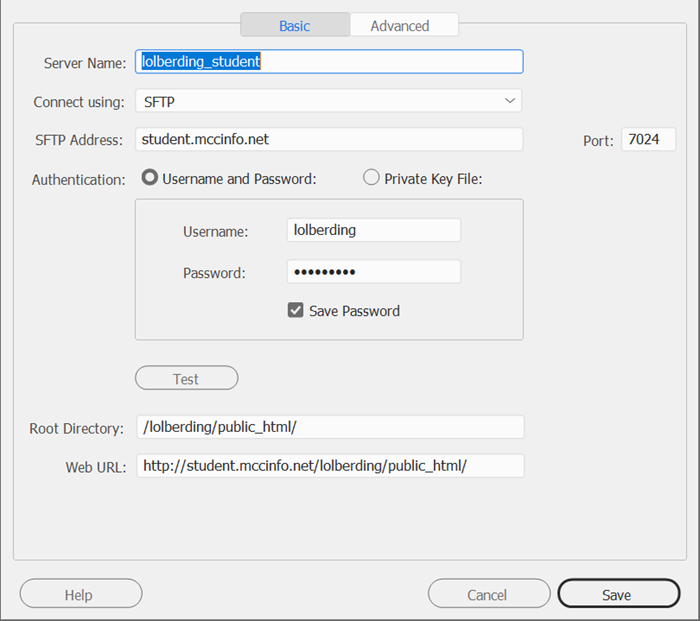
- Select the Servers link on the left to define the remote server. Click on the + button and the Basic site settings window appears. Fill out the FTP information for the remote site as shown below.
- Server Name: Enter a name you want to use to identify these server settings.
- Connect using: Select SFTP. (Dreamweaver supports FTP, SFTP, Local Network, RDS, and WebDAV connections.)
- SFTP Address: student.mccinfo.net
- Port: 7024
- Username: username (use the same username you use to log in to Canvas.) DO NOT use mccnet\ before your username.
- Password: Use the same password you use to log in to Canvas.
- Root Folder: Use your username preceded by a / along with the path to the public_html folder (ie. /username/public_html)
*NOTE: The Password Center ( http://www.mccneb.edu/password ) is a new web resource available to all students and staff. This web site allows you to change (reset) your password even if you don't know your username and password, provided the personal information you enter to verify your identity, matches the information the College has in it's database.
- Click the Test button when finished to ensure that the information provided was correct and that you can access your remote site using FTP.
- Click Save
- Click Save