Creating an XHTML Document
Reference Sheet
This outline should be used as a reference as you write your XHTML documents
in this course.
1. USE A TEXT EDITOR
To begin writing XHTML you must use a plain text editor. Microsoft Windows
comes with the text editor Notepad, and Mac OS comes with TextEdit.
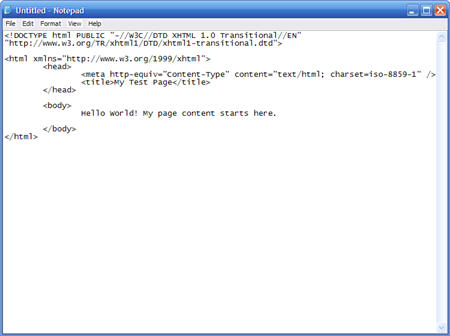 2. WRITE YOUR XHTML
Once you've opened your text editor, begin writing your XHTML code. Here's a
basic outline of the steps you need to take:
- DTD. Always begin with the appropriate DOCTYPE
declaration.
- html
element. The first, or root, element of your XHTML document must be:
<html> </html>. In addition, the opening <html> tag must include the
xmlns attribute (as discussed in the XHTML 1.0 Specifications
handout).
- head
element. The next required element, or the first child of your html element,
must be : <head></head>
- title element. Inside the head element you must include:
<title></title>
:
Though the title element doesn't appear on screen, it is used to identify
the document and does appear in the browser window's title bar.
- meta element. This is also placed
inside the head element. The meta tag is used to provide additional
information about the page, in this case the character set
in use.
- body element. After
the head element closes comes the second child of the html element, :
<body></body>
Tip: Using indentations and line breaks can make your code more readable
3. SAVE AS PLAIN TEXT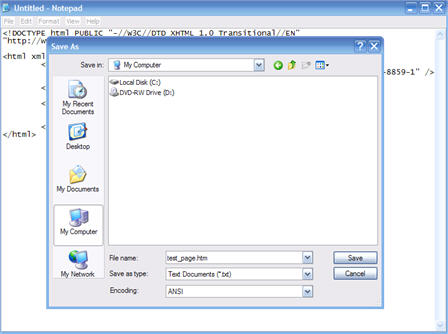
- Go to the File menu
- Click Save As...
- Save the file as a text file using a simple file name with only alphabetic,
numeric characters, and the underscore character (_). Do not use
blank spaces or other special characters.
- Use the file extension
.htm which will have to be typed by you at the end of the file name. For
example: home.htm, default.htm, week_1.htm. Be sure to type the .htm file
extension in the file name on every file saved in a text editor so that the
program won't assign its own file extension.
Note: Web servers usually have a default index file that is loaded when an
URL ends with a directory name rather than a filename. The filenames used as
the default index file is usually index.htm, index.html, or default.htm. The
Metro Web servers use default.htm. We will discuss this further in future modules.
At this time, you should just be aware that there are special file names reserved
for these special types of files.
4. PREVIEW YOUR PAGE IN A BROWSER
To preview your Web page in a browser:
- Go the File menu
- Click on Open... (or some similar command) and then instruct
the browser to open the .htm file you have created and saved.
- If the Web page needs to be modified, return to the text editor, make changes
and then save the file again.
- Return to the browser and refresh the view
of the browser to display the most recently saved version of your Web page
using the Refresh or Reload command.
5. VALIDATE YOUR XHTML
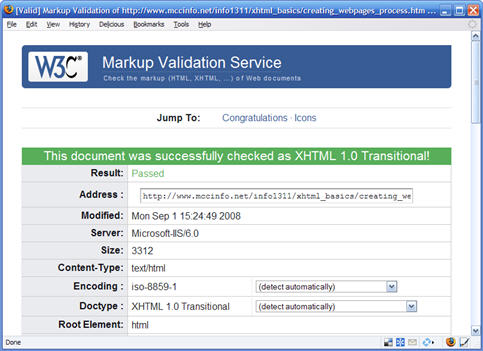 This is a standards-based course. You are expected to validate your code
before submitting it using a free validator. I recommend using the W3C's at
http://validator.w3.org.
This is a standards-based course. You are expected to validate your code
before submitting it using a free validator. I recommend using the W3C's at
http://validator.w3.org.
To validate your document at validator.w3.org:
- Go to http://validator.w3.org
- Under Validate By File Upload click Browse
- Find
your .htm file on your local computer, select it, and click Open.
- Under
Validate By File Upload click Check
- validator.w3.org will check your document
for well-formedness, then compare it to the DTD that you declared as your
DOCTYPE. Errors are listed with an explanation of the
problem.
- Correct errors and resubmit through validator.w3.org